How to Stream on Twitch: A Setup Guide That Starts With Audio
How to set up and start streaming on Twitch, the bandwidth and encoder settings that matter, and why your microphone matters more than your camera.
How to get a Twitch stream running, the bandwidth and encoder settings that actually matter, why audio deserves your first purchase, and what to do with the recording once the stream ends.
To stream on Twitch you need an account with two factor authentication enabled, streaming software such as OBS Studio, a computer with headroom to encode, and enough upload bandwidth. Around 5 to 6 Mbps supports 720p and roughly 10 Mbps supports 1080p. Spend on the microphone before the camera.
The useful question is not "what gear do I need?" It is "what makes someone stay past the first thirty seconds?" Nearly always the answer is that they can hear you clearly and the stream is not buffering. Neither of those is a camera problem.
Before you can go live
Create the account and enable two factor authentication. Twitch requires 2FA before it will let you broadcast, and discovering that at the moment you want to start is a frustrating way to find out.
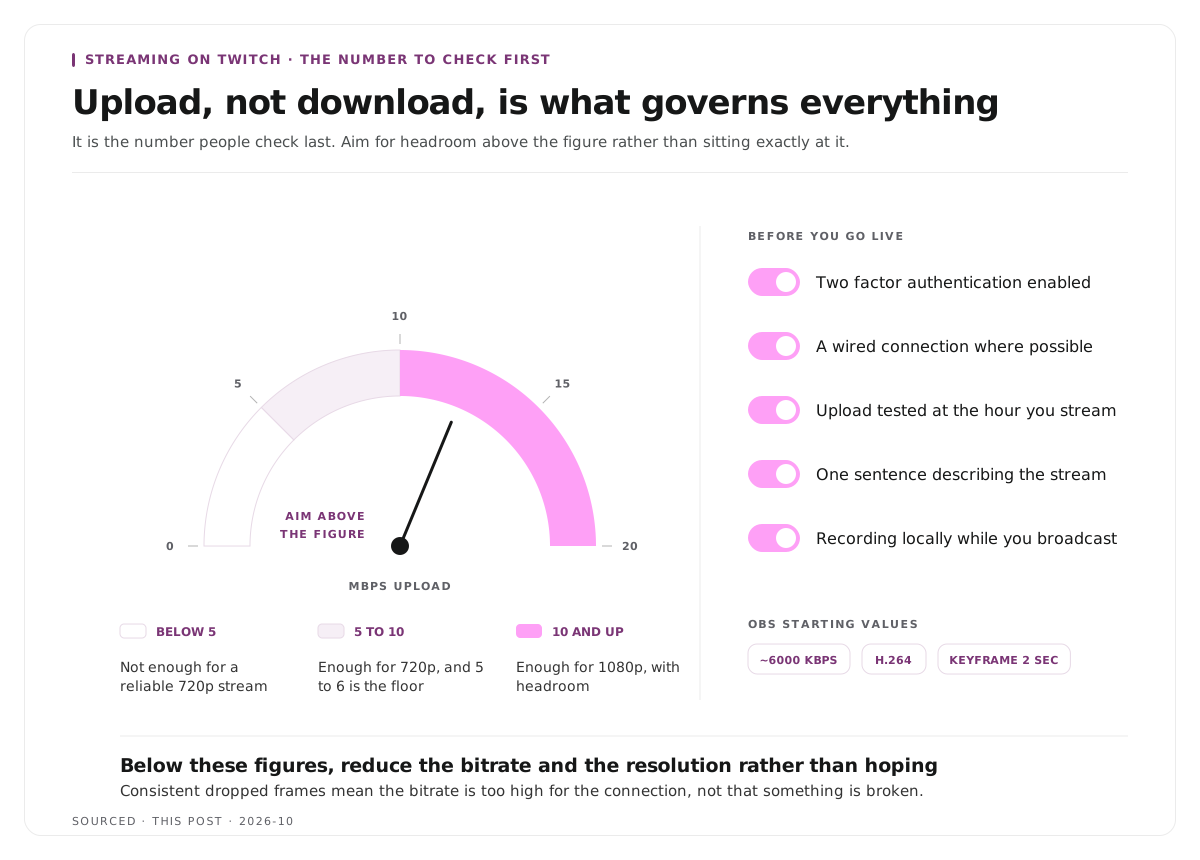
Check your upload speed, not your download speed. This is the number people check last and it is the one that governs everything. Run a speed test and look at upload. Roughly 5 to 6 Mbps supports a 720p stream and around 10 Mbps supports 1080p, with headroom above that figure rather than exactly at it.
Use a wired connection if you can. Wifi varies through the evening as a household or building gets busier, and a stream that was fine in testing can degrade at exactly the hour you want to broadcast.
Decide what the stream is. Not a content strategy, just a sentence. Playing something, building something, talking about something. A stream with no shape is the most common reason the first few attempts feel flat.
Equipment, in the order it matters
| Priority | Item | Why |
|---|---|---|
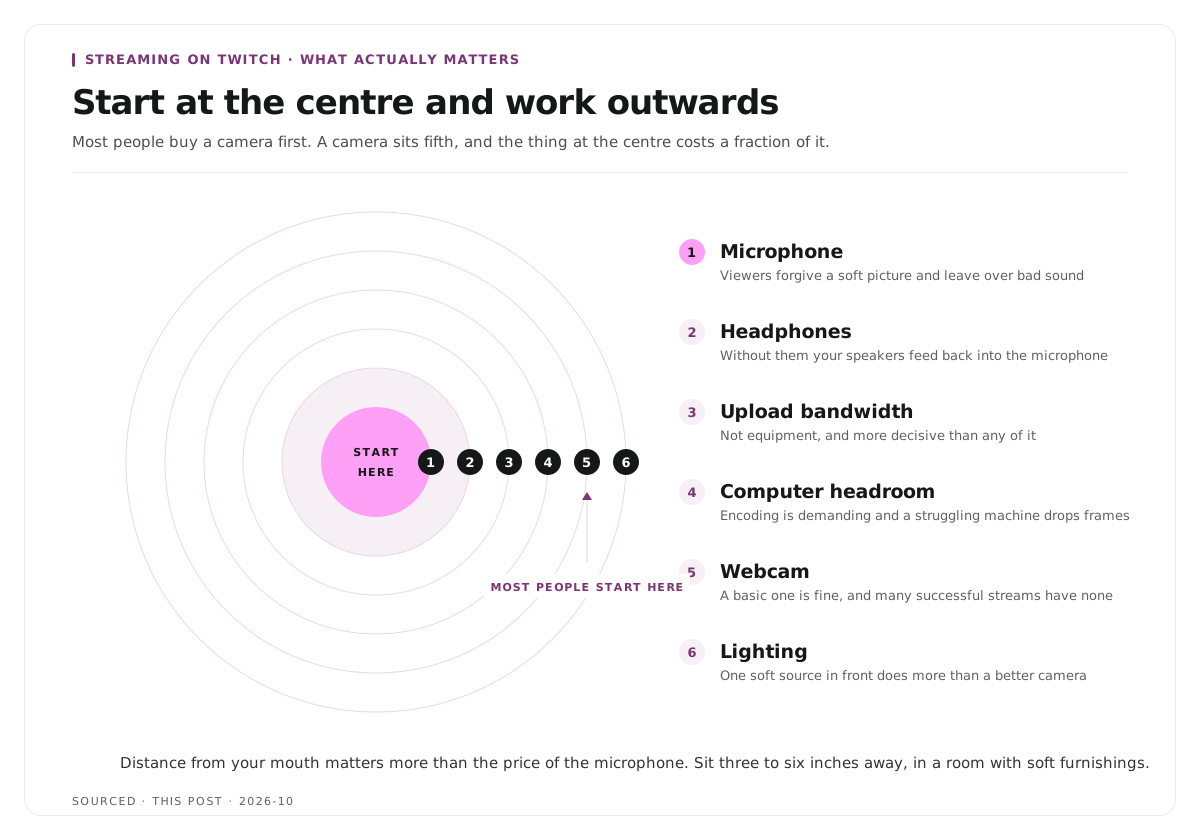
| 1 | Microphone | Viewers forgive a soft picture and leave over bad sound |
| 2 | Headphones | Without them your speakers feed back into the microphone |
| 3 | Upload bandwidth | Not equipment, and more decisive than any of it |
| 4 | Computer headroom | Encoding is demanding and a struggling machine drops frames |
| 5 | Webcam | A basic one is fine, and many successful streams have none |
| 6 | Lighting | One soft source in front does more than a better camera |
The ordering is the useful part. Most people buy a camera first, and a camera sits fifth.
On microphones, an entry level USB model is genuinely sufficient to begin. The distance from your mouth matters more than the price, so sit three to six inches away rather than across the desk.
On rooms, soft furnishings beat equipment. A carpet, curtains and a sofa produce better audio than an expensive microphone in a bare room, because echo is the one problem that cannot be fixed afterwards.
Set up OBS Studio
OBS Studio is free, open source and the default choice for most streamers.
- Install it and open the Auto-Configuration Wizard. It usually appears on first launch. If not, it is under Tools, then Auto-Configuration Wizard. It tests your machine and connection and sets sensible defaults, which is a better starting point than configuring manually.
- Connect your account. In Settings, then Stream, choose Twitch as the service and log in. The software retrieves your stream key automatically, which is safer than copying it by hand, since a stream key is a credential and should never appear on screen.
- Check the output settings. Common starting values are a bitrate around 6,000 kbps, the H.264 encoder, and a keyframe interval of 2 seconds. If you are below the bandwidth figures above, reduce the bitrate and the resolution rather than hoping.
- Build one simple scene. Your game or screen capture, a webcam source if you are using one, and your microphone. Resist building six scenes before your first stream.
- Add your microphone as an explicit source and watch the level meter while you talk. Aim for it to sit well below the top of the range, since clipping on loud moments cannot be repaired.
Record locally while you stream. OBS can do both at once, and the local recording is far higher quality than the broadcast because it never went through your connection. If you intend to make clips afterwards, this single setting is the difference between usable and compressed footage, which is the same argument made in how to record a podcast remotely.
Your first stream
Test to a private or unlisted destination first. Ten minutes, with the real setup, watched back afterwards. You are checking audio level, whether the capture is actually capturing, and whether your machine is dropping frames.
Start before you are ready. A few minutes of a holding scene before you begin properly lets you confirm everything is live and gives people time to arrive.
Talk to nobody. The hardest part of early streaming is speaking continuously with no audience responding. It feels strange and it is the skill the whole format rests on. Narrating what you are doing is the easiest way in.
Watch for dropped frames. OBS reports them, and consistent dropped frames mean your bitrate is too high for your connection rather than anything being broken.
Keep the first ones short. An hour is plenty. Four hour streams are a thing you grow into rather than start with.
The mistakes that cost most
Untested connection. The most common failure, and the one that takes the stream down entirely rather than degrading it.
Audio that is quiet, clipped or echoing. Viewers leave quickly over sound, and far more readily than over picture quality.
No plan at all. Dead air while you decide what to do next is the most common reason early streams feel uncomfortable to watch.
Reading every comment mid sentence. Acknowledging chat is good. Breaking off in the middle of explaining something to read a message is disorienting for everyone who was following.
Not telling anyone. An unannounced stream is an empty stream, and posting once before you go live is the cheapest thing on this list.
Streaming irregularly. Showing up at an unpredictable time means an audience cannot form a habit around you.
What to do with the recording
This is the part most people skip, and it is where the audience growth actually comes from.
A stream reaches the people who were there. The clips from it reach people who have never heard of you, on platforms where discovery still happens, for weeks afterwards. A three hour stream typically contains ten to twenty moments worth posting.
Mark things as they happen. The platform clip button, a moderator dropping timestamps, or simply saying "that was good" out loud. Ten timestamps turn a three hour search into ten short checks, and this is the single habit that determines whether clipping gets done at all.
Use your local recording rather than the VOD where you have one, since it never went through the compression of the broadcast.
Expect a poor ratio and do not be discouraged by it. Most of a stream is transition, setup and waiting, and none of it clips. Finding five good moments in three hours is a normal result rather than a failure.
The framing problem specific to streams, where a composite layout with a webcam box does not crop to vertical, is covered in how to clip multi speaker panel discussions without losing context, and the general selection criteria in how many clips you should make from one podcast episode.
Worked example: two first streams
This is an invented example, not measured data.
Two people start streaming in the same week.
The first buys a good camera and a ring light, uses the built in laptop microphone, streams on wifi, and goes live unannounced. The picture is sharp. The audio is thin and echoing, the stream buffers twice, and three people watch. They conclude streaming is not for them.
The second buys an entry level USB microphone and uses the webcam they already had, runs ethernet, tests for ten minutes to an unlisted stream, and posts once before going live. Eleven people watch. They also record locally, mark four moments, and post two clips the next day.
Neither stream was good. One of them produced something to build on.
Where Montage fits
Montage does not stream, has no Twitch integration and no live capability. Everything on this page happens before it is involved.
It applies to the recording afterwards. Upload the local recording or the VOD, up to 20GB at 4K, which matters because streams produce very large files, and it returns a timestamped transcript alongside 8 to 10 scored clip candidates, each trimmable by editing the transcript text, with branded captions and vertical reframing applied, exporting as MP4 for social or XML, FCPXML and JSON for an editor.
Two honest limits for streams specifically. Scoring works from what was said, so a purely visual moment with no verbal reaction is harder to surface. And it does not know your running jokes, so anything depending on context from ninety minutes earlier will be scored on its own and you will need to reject it yourself. The pipeline is explained in how AI video clipping works.
To try it on one recording, use the podcast clip finder.
Limitations and troubleshooting
The stream keeps buffering for viewers. Bitrate is too high for your upload. Lower it, drop to 720p, and move to a wired connection.
OBS reports dropped frames. Connection rather than the machine. Encoding overload shows as lag and stuttering instead.
My audio is quiet and the camera is fine. Check the microphone source is actually selected in OBS rather than a default device, and watch the level meter while speaking.
There is an echo on my stream. You are listening through speakers rather than headphones. There is no post fix for a live stream.
My machine struggles while streaming. Close everything else, lower the output resolution, and check whether hardware encoding is available in settings.
Nobody watches. Usually because nobody was told. Announce before you go live, and keep a predictable schedule so an audience can form a habit.
I cannot find anything worth clipping. Likely nothing was marked during the broadcast. Check the chat replay for message bursts, which is your audience telling you where the moments were.
Frequently asked questions
What do you need to stream on Twitch?
A Twitch account with two factor authentication enabled, streaming software such as OBS Studio, a computer with encoding headroom, enough upload bandwidth, and a microphone. A camera is optional.
How much upload speed do you need for Twitch?
Roughly 5 to 6 Mbps for a 720p stream and around 10 Mbps for 1080p, with headroom above those figures rather than sitting exactly at them.
What bitrate should you use on Twitch?
Around 6,000 kbps with the H.264 encoder and a two second keyframe interval is a common starting point. If your upload is below the figures above, reduce the bitrate and resolution rather than pushing it.
Do you need a webcam to stream on Twitch?
No. Plenty of streams run without one. A microphone matters considerably more, because viewers leave over audio far more readily than over picture.
Why does my Twitch stream keep buffering?
Almost always bitrate exceeding your available upload bandwidth, often made worse by wifi. Lower the bitrate, drop the resolution, and use a wired connection.
Should you record locally while streaming?
Yes, if you intend to make clips. The local recording never passes through your connection, so it is considerably higher quality than the broadcast version.
Does Montage work with Twitch streams?
It processes the recording after the stream ends. There is no live integration and no connection to Twitch.