Video Podcast Equipment: What You Actually Need at Each Budget
Video podcast equipment by budget tier, what to buy first, what to skip, and which purchases change how much short form content the episode produces.
Video podcast equipment organised by budget, covering microphones, cameras, lighting and the support gear nobody mentions, plus which purchases actually change the finished episode.
A video podcast needs one microphone per speaker, one camera per speaker, one soft light source per speaker, headphones for everyone, and software that records both audio and video locally. Buy the microphone first. Audio quality decides whether people stay, and picture quality decides very little.
The useful question is not "What should I buy?" It is "what is currently the worst thing about my recordings?" Fix that one thing, then ask again. Almost every podcast equipment list is ordered by category. Your spending should be ordered by which weakness is costing you listeners.
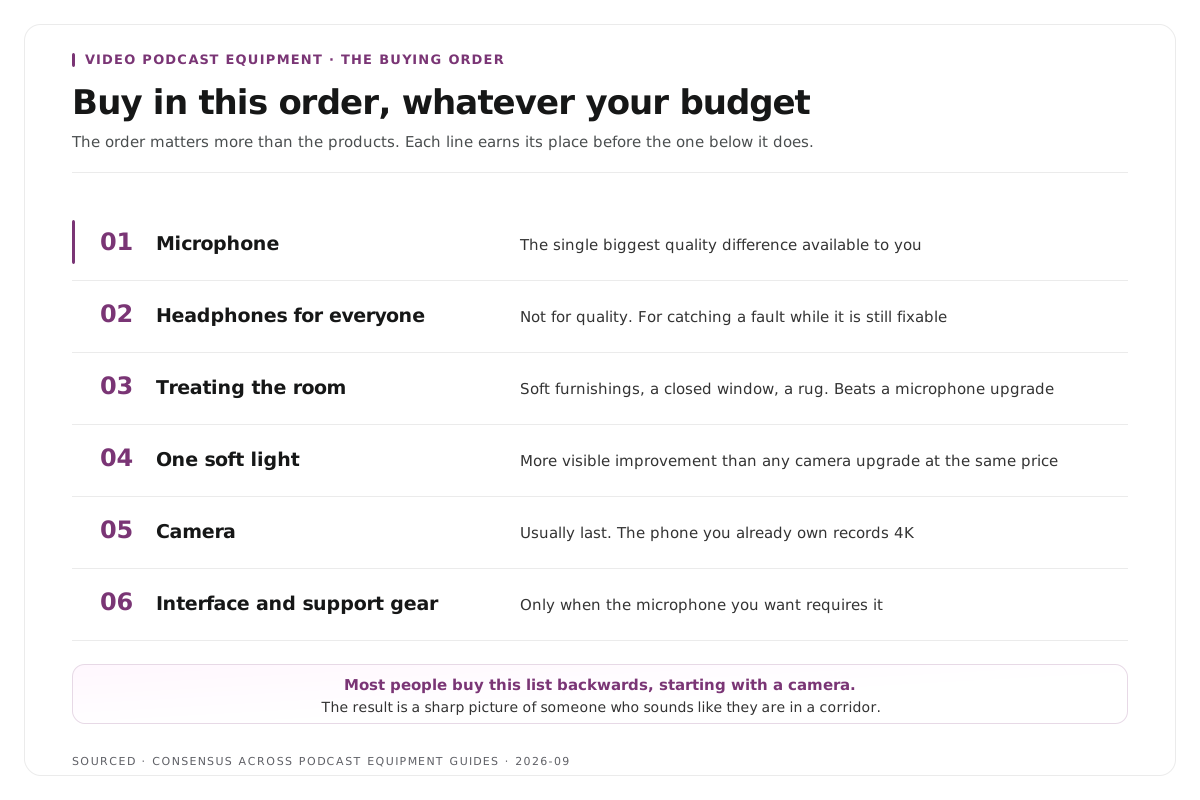
Buy in this order, whatever your budget
The order matters more than the products.
- Microphone. The single biggest quality difference available to you.
- Headphones for everyone. Not for quality, for catching problems while they happen. A recording ruined by an unnoticed fault is the most expensive thing on this page.
- Treating the room. Soft furnishings, closed windows, a rug. Costs little and outperforms a microphone upgrade in a bare room.
- One soft light. More visible improvement than any camera upgrade at the same price.
- Camera. Usually the last thing that needs attention, because a phone already does this well.
- Audio interface and support gear. Only when the microphone you want requires it.
Most people buy this list backwards, starting with a camera, and end up with a sharp picture of someone who sounds like they are in a corridor.
The starter setup
For a first show, or any show that is not yet sure it will continue.
Microphone. A USB microphone that plugs straight into a laptop. Dynamic USB microphones handle untreated rooms better than condenser microphones do, because they pick up less of everything that is not directly in front of them. The Samson Q2U and the Blue Yeti are the two models that recur across nearly every equipment guide, and the Q2U being both USB and XLR means it still works if you upgrade later.
Camera. The phone you already own. A recent phone records 4K and out-resolves most webcams. Mount it, do not hold it. If you want something that stays plugged in, a webcam such as the Logitech C920 or C930e appears in guide after guide for a reason.
Lighting. One ring light or small softbox, placed in front of you and slightly to one side. Not behind you, and not overhead.
Headphones. Any closed back pair, for every participant.
Software. Free recording software is genuinely fine at this stage, provided it records each participant locally rather than capturing the call, which is the distinction explained in the best tools to convert Zoom recordings to Shorts.
Guides converge on roughly three hundred dollars for a setup along these lines. The gap between this and nothing is enormous. The gap between this and the next tier is much smaller than the price difference suggests.
The serious setup
For a show that is running weekly and producing clips.
Microphone. An XLR dynamic microphone through an audio interface. The Shure range appears more than any other name across equipment guides. This is the point where an interface becomes necessary, because XLR microphones need one.
Interface. A two input interface covers a host and one guest in the room. Four inputs if you record panels.
Camera. A mirrorless camera gives depth of field and interchangeable lenses. Connecting one to a computer as a webcam usually needs a capture card, which is the item most first time buyers forget and discover on recording day.
Lighting. A key light in front at roughly forty five degrees, a fill light opposite it to soften the shadow, and a backlight behind the subject for separation. You do not need all three at once, and adding them in that order gives the most improvement per purchase.
Support. Boom arms keep microphones out of frame and off the desk, which also removes the thud every time someone leans on it. A tripod per camera. Cables longer than you think.
What to skip
A mixer, unless you are running live and need to control levels in real time. An interface covers recording.
A second camera, until the first one is properly lit. An extra angle on badly lit footage is two badly lit angles.
A studio backdrop. Depth does more than decoration. Move the subject away from the wall and light the background separately.
Expensive headphones. These are monitoring tools, not listening tools.
A condenser microphone in an untreated room. It will faithfully capture the room, which is the problem you were trying to solve.
The equipment decisions that change your clip count
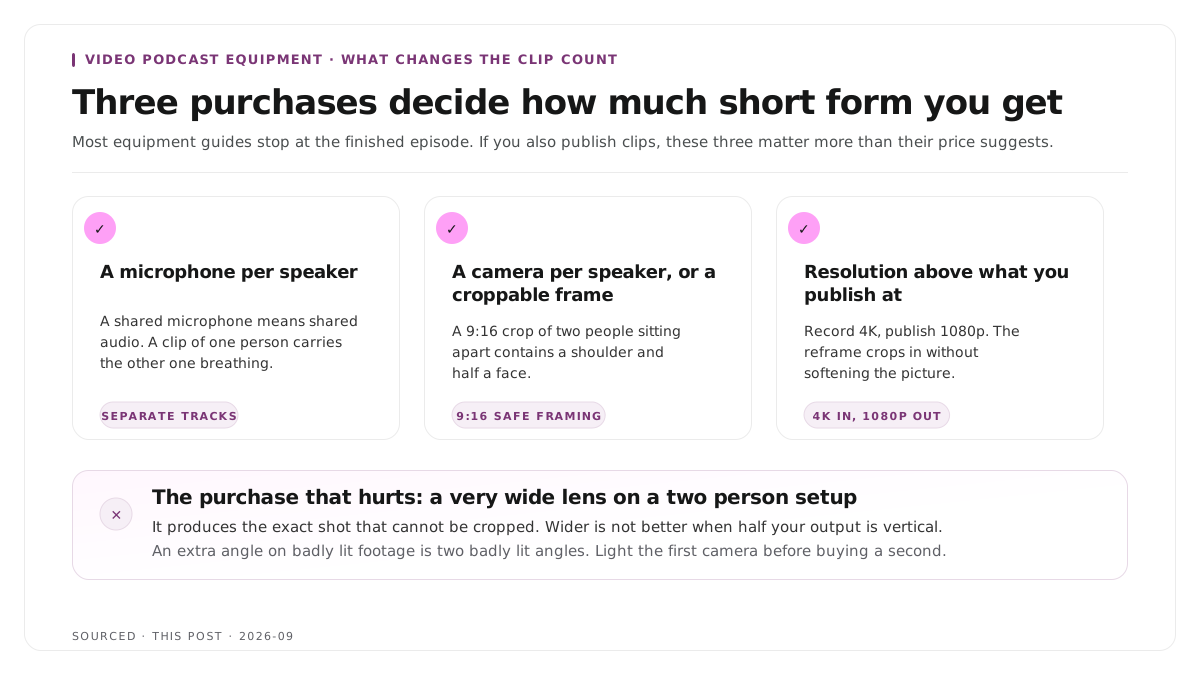
Most equipment guides stop at the finished episode. If you also publish clips, three purchases matter more than their price suggests, and one popular purchase actively hurts you.
A microphone per speaker, always. A shared microphone means shared audio, and a clip of one person carries the other person's breathing and chair noise. Separate microphones produce separate tracks, and separate tracks are what make a forty second clip clean.
A camera per speaker, or a frame you can crop. A single wide two shot looks fine in the full episode and cannot be cropped to vertical, because a 9:16 crop of two people sitting apart contains a shoulder and half a face. Either give each speaker their own camera, or frame the wide shot so a vertical crop around each person still contains a whole head.
Resolution above what you publish at. Recording 4K and publishing 1080p gives the reframing step room to crop in without softening the image. This is the clearest argument for a better camera, and it is about cropping rather than sharpness.
The purchase that hurts: a very wide lens on a two person setup. It produces the exact shot that cannot be cropped. Wider is not better when half your output is vertical.
The framing side of this is covered in how to edit an interview video, and the remote capture side in the best tools to convert Zoom recordings to Shorts.
Worked example: the same budget spent two ways
This is an invented example, not measured data.
Two shows have the same money to spend on a two person video podcast.
The first buys a mirrorless camera, a tripod and a good lens, and records audio on the camera's built in microphone. The picture is beautiful. The audio has room echo on both voices, mixed to a single track. The episode is watchable and the clips are not, because forty seconds of echoey audio has nowhere to hide.
The second buys two dynamic microphones, an interface, two boom arms and one soft light, and records video on two phones. The picture is good rather than beautiful. The audio is clean and separated, each speaker is framed so a vertical crop works, and the episode produces nine clips.
The second setup cost the same and produced more usable output, because the money went to the constraint rather than to the most visible upgrade.
Where Montage fits
Montage sells no hardware, recommends no specific products commercially, and has no role in your recording setup. Everything on this page happens before Montage is involved.
What it does is the stage afterwards. Upload the finished recording, up to 20GB at 4K, and it returns 8 to 10 scored clip candidates rather than an unranked pile, lets you trim each by editing transcript text, applies branded captions, reframes to vertical and exports MP4 for social or XML, FCPXML and JSON for an editor.
It cannot separate two voices that were recorded onto one track, and it cannot crop a wide two shot into a usable vertical frame. Those limits are set by the equipment decisions above, which is why they are on this page rather than treated as an editing problem.
To see what a single episode yields, the podcast clip finder runs on one file, realistic volume expectations are in how many clips you should make from one podcast episode, and the wider tool category is compared in the best podcast clip makers in 2026.
Limitations and troubleshooting
Better microphone, still sounds bad. The room, not the microphone. Add soft surfaces, move away from bare walls, and get closer to the microphone. Reflection is not removable convincingly.
The audio peaks and distorts on loud moments. Input gain is too high. Set levels so normal speech sits well below the maximum, because a distorted peak cannot be repaired.
The camera looks worse than the phone did. Usually lighting rather than the camera. A larger sensor in poor light looks worse than a phone in good light.
The mirrorless camera will not appear as a webcam. Most need a capture card. Check before the recording day, not on it.
Both speakers are on one track and one of them coughs. Nothing fixes this cleanly. It is the argument for a microphone per speaker, and the reason that purchase comes before the camera.
The clips look soft after cropping to vertical. The source was recorded at the resolution you publish at, so cropping enlarged it. Record above your publishing resolution.
Frequently asked questions
What equipment do you need for a video podcast?
One microphone per speaker, one camera per speaker, one soft light per speaker, headphones for everyone, and software that records audio and video locally. Buy the microphone first.
Can you start a video podcast with just a phone?
Yes. A recent phone records 4K and out-resolves most webcams. Mount it rather than holding it, light the subject from the front, and add an external microphone as your first upgrade.
Do you need an audio interface for a podcast?
Only if you use XLR microphones, which require one. USB microphones connect directly to a computer and are the reason most starter setups do not include an interface.
Should you use a dynamic or condenser microphone?
Dynamic in an untreated room, which is most rooms. Condenser microphones capture more detail and more of the room along with it, so they suit treated spaces rather than spare bedrooms.
How much does a video podcast setup cost?
Equipment guides converge on roughly three hundred dollars for a workable starter setup of webcam, USB microphone, light and free software. Beyond that, spending tracks the number of speakers more than the quality level, since each one needs their own microphone.
Does Montage sell or recommend podcast equipment?
No. Montage processes finished recordings into clips and has no hardware business. The gear decisions are entirely yours.