How to Trim a Video on Windows and Mac Without Extra Software
Trim a video using tools already on your computer. QuickTime on Mac, Photos and Clipchamp on Windows, plus which one can cut from the middle and which cannot.
How to trim a video using tools already installed on your computer, which built in option can remove a section from the middle, and when trimming stops being the right approach.
Every Mac and every Windows machine can trim video without installing anything. On Mac, open the file in QuickTime Player and choose Edit then Trim. On Windows 11, the Photos app trims the start and end, and Clipchamp, which also ships with the operating system, can remove a section from the middle.
The useful question is not "which tool should I use?" It is "am I cutting the ends or cutting the middle?" Those are different jobs, and the built in tool that does the first cannot do the second, which is where most of the frustration with this task comes from.
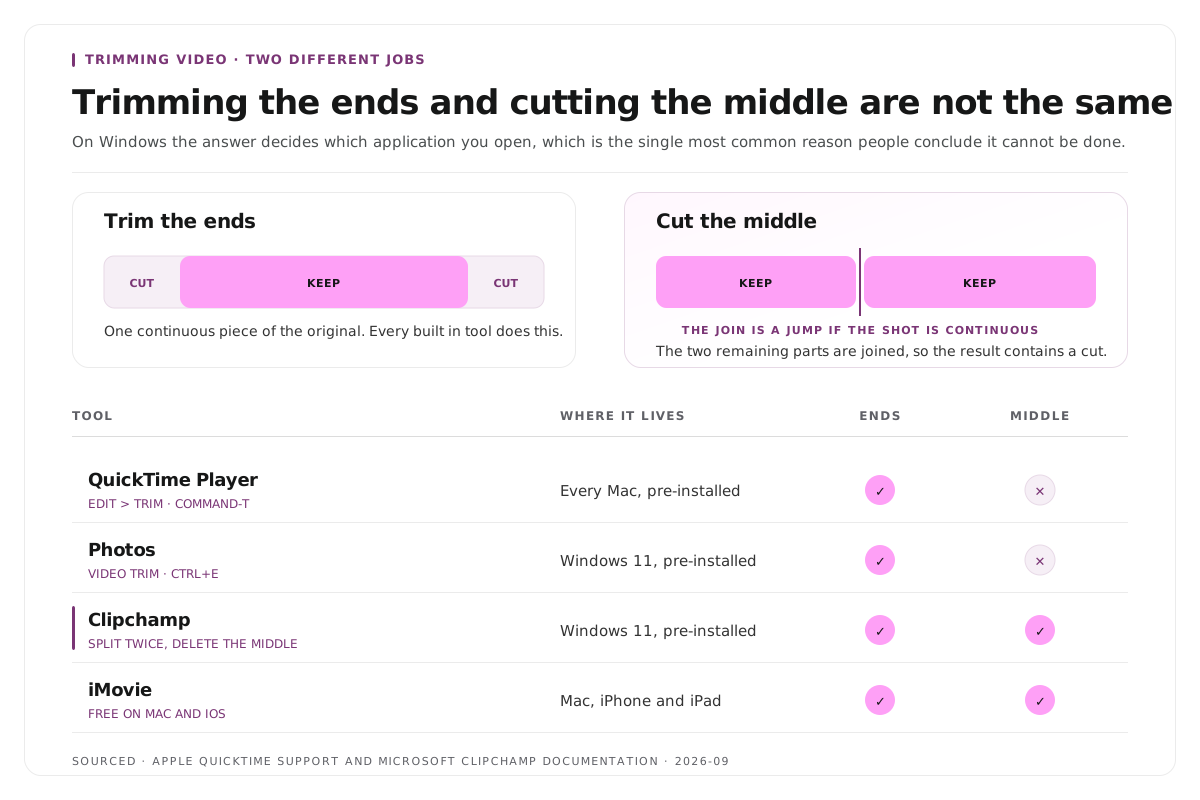
Trimming the ends or cutting the middle
These sound similar and are not.
Trimming the ends removes material from the beginning, the end, or both. The result is one continuous piece of the original. Every built in tool does this.
Cutting the middle removes a section from inside and joins the two remaining parts. The result contains a cut, which means it also contains a jump if the shot is continuous.
Work out which you need before opening anything, because on Windows the answer decides which application you open.
How to trim a video on Mac
QuickTime Player is installed on every Mac and handles this in under a minute.
- Open the movie you want to trim in QuickTime Player, then choose Edit then Trim. The keyboard shortcut is Command-T.[1]
- Drag the yellow handles in the trimming bar. The area outside the yellow handles is the area that gets removed.[1]
- For precise edits, click and hold a handle to see individual frames of the clip.[1]
- Click Trim.
Save it as a new file rather than over the original. Use File then Export As and give it a different name. Trimming is destructive to the open document, and there is no reason to lose the full length version you may want again.
QuickTime trims the ends only. To remove a section from the middle you need iMovie, which is also free, or a proper editor.
How to trim a video on Windows
Windows 11 gives you two tools and they do different things.
The Photos app, for trimming the ends
- Right click the video file, choose Open With, then Photos.
- Click the Video trim button in the toolbar, or press Ctrl+E.
- Drag the sliders to the section you want to keep.
- Save.
Fast, and limited. The Photos trim removes material from the beginning or the end only. It cannot take a section out of the middle, which is the single most common reason people conclude Windows cannot do this.
Clipchamp, for cutting the middle
Clipchamp ships pre-installed on Windows 11 and does everything Photos does plus the part it cannot.
- Open Clipchamp and import your video, either by dragging it in or using the import button.
- Drag the clip onto the timeline at the bottom.
- To trim the ends, use the Video trim control in the toolbar, or press Ctrl+E, then set the start and end points.
- To remove a middle section, position the playhead and use Split to cut the clip in two, split again at the end of the unwanted part, then delete the middle piece and close the gap.
- Choose Save as copy, pick a location, and save. The original file is not modified.
If you are on Windows 10 rather than 11, Clipchamp is a free download and the Photos app trim works the same way.
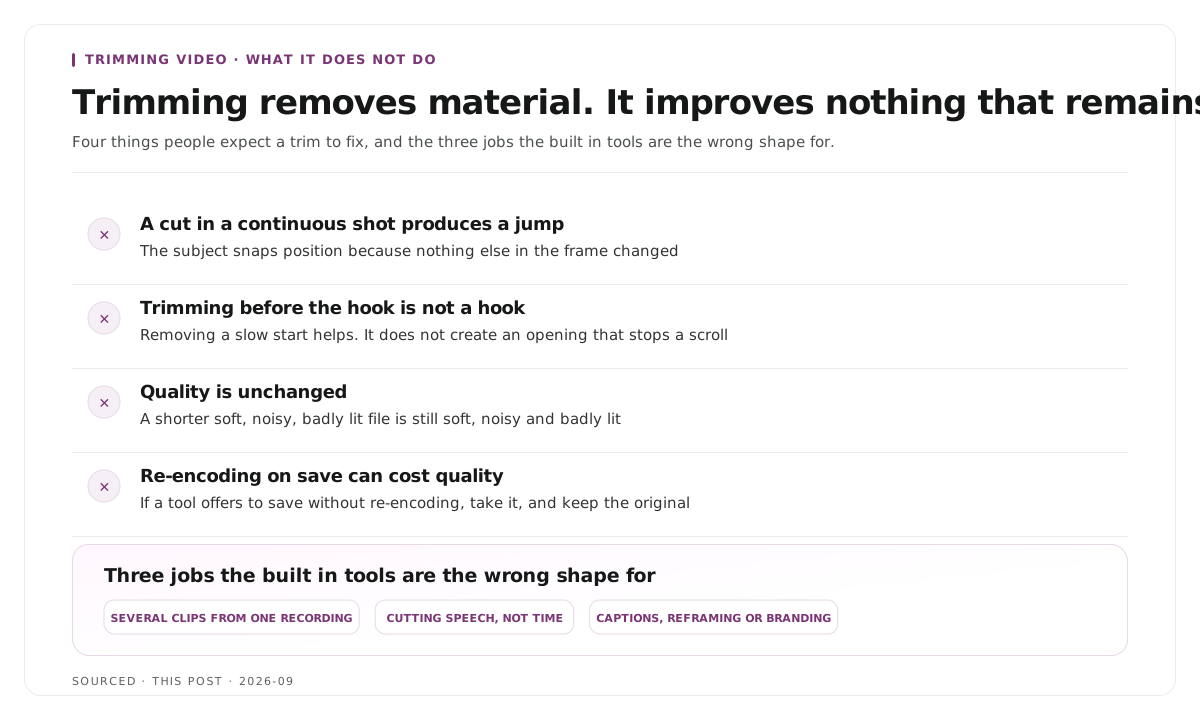
What trimming does not fix
Trimming removes material. It does not improve anything that remains.
A cut in the middle of a continuous shot produces a jump. The subject snaps to a new position because nothing else in the frame changed. That is normal, and covering it is editing work rather than trimming work, as set out in how to edit an interview video.
Trimming before the hook is not the same as having a hook. Removing a slow start helps. It does not create an opening that stops a scroll, which is a writing problem rather than an editing one.
Quality is unchanged. Trimming a soft, noisy or badly lit file gives you a shorter soft, noisy, badly lit file. The repairs that are possible belong to a proper editor rather than a trimming tool.
Re-encoding on save can cost quality. Some tools re-compress when they export. If a tool offers to save without re-encoding, take it, and keep the original either way.
When trimming is the wrong approach entirely
The built in tools are right for one file and one or two cuts. They stop being right in three situations.
You need several clips from one long recording. Trimming a sixty minute file down to a forty second clip, eight separate times, means eight passes through the same hour. That is the job an entire category of tool exists to remove.
You are cutting speech rather than time. Removing filler words, false starts and tangents through a trimming bar means hunting for word boundaries visually in a waveform. Editing by transcript instead, where deleting the sentence deletes the video, is faster by a wide margin and is described in text based video editing.
The output needs captions, reframing or branding. None of the built in tools do any of that, so the trim is only the first of four steps.
Worked example: one file, two jobs
This is an invented example, not measured data.
Someone records a fourteen minute screen walkthrough. The first ninety seconds are setup chatter and the last forty are them reaching for the stop button.
Job one is removing both ends. QuickTime on Mac, or the Photos app on Windows, does that in under two minutes and the result is a clean twelve minute file.
Job two is pulling three forty second clips out of the middle of that same recording for social. The same tools can technically do it by trimming three separate copies, which is three passes, three exports and three file names to manage, and then none of them have captions or vertical framing.
The first job is what built in trimming is for. The second is not, and recognising the difference before starting is worth more than any particular tool.
Where Montage fits
Montage does not trim single files and is not a replacement for QuickTime or Clipchamp. If you want to cut ninety seconds off the front of one video, use the tool already on your computer, which is faster and free.
What Montage does is the second job above. Upload a long recording, up to 20GB at 4K, and it returns 8 to 10 scored clip candidates rather than an unranked pile, each trimmable by editing transcript text, with branded captions and vertical reframing already applied, exporting as MP4 for social or XML, FCPXML and JSON for an editor.
The editorial decisions stay with you. Montage does not decide which clip is worth publishing and does not post anything. To try it on one recording, use the podcast clip finder, and for a comparison of the category see the best podcast clip makers in 2026.
Limitations and troubleshooting
The Photos app will not let me cut from the middle. It cannot. Use Clipchamp and the Split tool instead.
The trimmed file is much larger or smaller than expected. The tool re-encoded on save. Look for an option to save without re-encoding, and keep the original.
The cut is audible as a click. The edit landed mid word or mid breath. Move it to a gap between words.
QuickTime overwrote my original. Trimming applies to the open document. Use File then Export As with a new name rather than saving in place.
The video will not open in Photos or QuickTime. The format is unsupported rather than the file being broken. Clipchamp accepts a wider range on Windows.
Trimming the start did not fix the slow opening. The problem is the first line rather than the first second, which is a writing issue rather than a trimming one, and it is covered in how to make shareable podcast clips for social media.
Frequently asked questions
How do you trim a video on a Mac without downloading anything?
Open it in QuickTime Player, choose Edit then Trim or press Command-T, drag the yellow handles to the section you want to keep, then click Trim. Everything outside the handles is removed.
How do you trim a video on Windows 11?
Right click the file, open it with Photos, click Video trim or press Ctrl+E and drag the sliders. For anything beyond the start and end, use Clipchamp, which is also pre-installed.
Can the Windows Photos app cut a section from the middle of a video?
No. The Photos trim only removes material from the beginning or the end. Clipchamp can remove a middle section using the Split tool.
Does trimming a video reduce its quality?
Trimming itself does not, but saving can if the tool re-encodes the file. Choose an option that saves without re-encoding where one is offered, and always keep the original.
What is the difference between trimming and cutting?
Trimming removes material from the ends and leaves one continuous piece. Cutting removes a section from the middle and joins what remains, which creates a visible jump in a continuous shot.
Does Montage trim videos?
Not single files. Montage takes a long recording and returns multiple scored clips with captions and vertical framing applied. For one quick trim, the tool already on your computer is faster.