How to Add Subtitles in Final Cut Pro: 3 Methods
Three ways to add subtitles in Final Cut Pro, including automatic generation, the two hardware and language limits Apple sets on it, and how to export correctly.
Three routes to subtitles in Final Cut Pro, the two limits Apple places on automatic generation, and the export setting that decides whether subtitles are burned in or selectable.
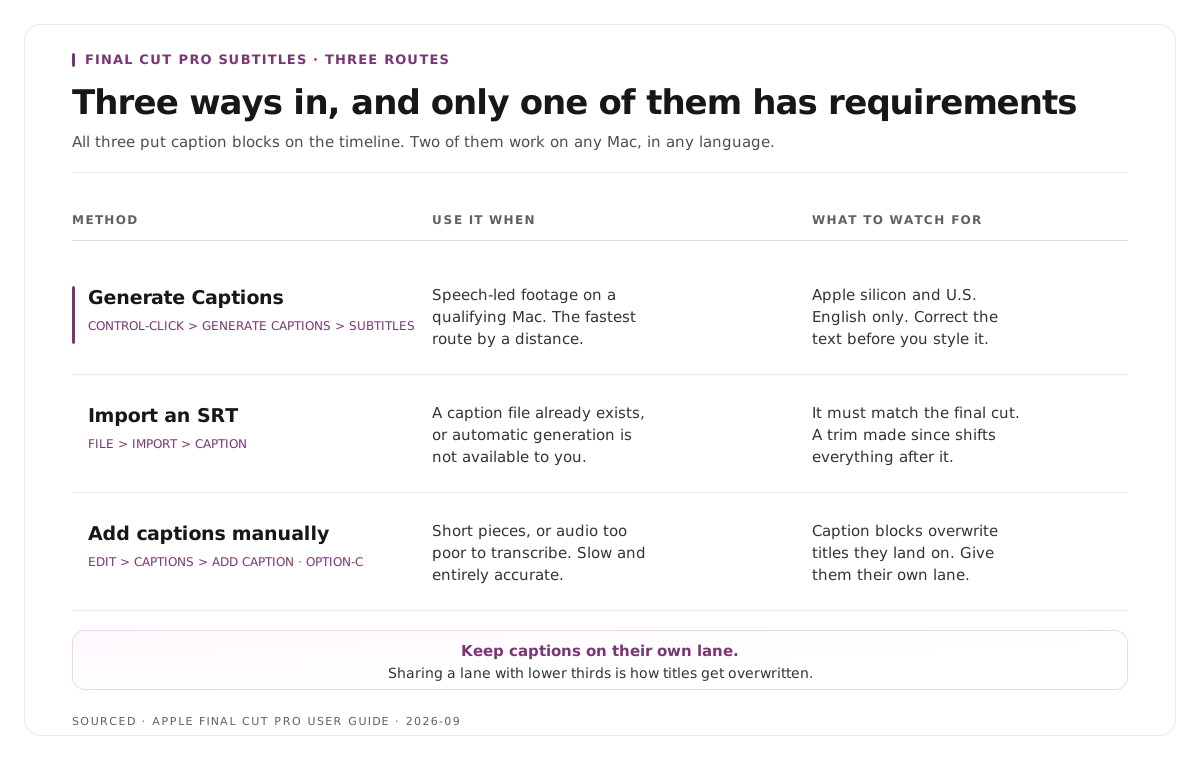
Final Cut Pro can generate subtitles automatically from speech, accept an imported SRT file, or let you type captions manually. Automatic generation is fastest, but Apple restricts it to Macs with Apple silicon and to U.S. English, so the other two methods still matter.[1]
The useful question is not "which method is fastest?" It is "will this method actually run on my machine and in my language?" Most guides to this subject skip that, and it is the reason a lot of people conclude the feature is missing when it is simply unavailable to them.
Method 1: generate subtitles automatically
This is the fastest route and the one worth trying first, provided your machine qualifies.
- Select one or more clips in the timeline that contain speech.
- Control-click the selection and choose Generate Captions, then Subtitles. You can also use Edit then Generate Captions then Subtitles, or press Shift-Command-S.
- Final Cut transcribes each selected clip and connects the resulting title clips to the clips they came from, with each one starting and ending in sync with the spoken words.
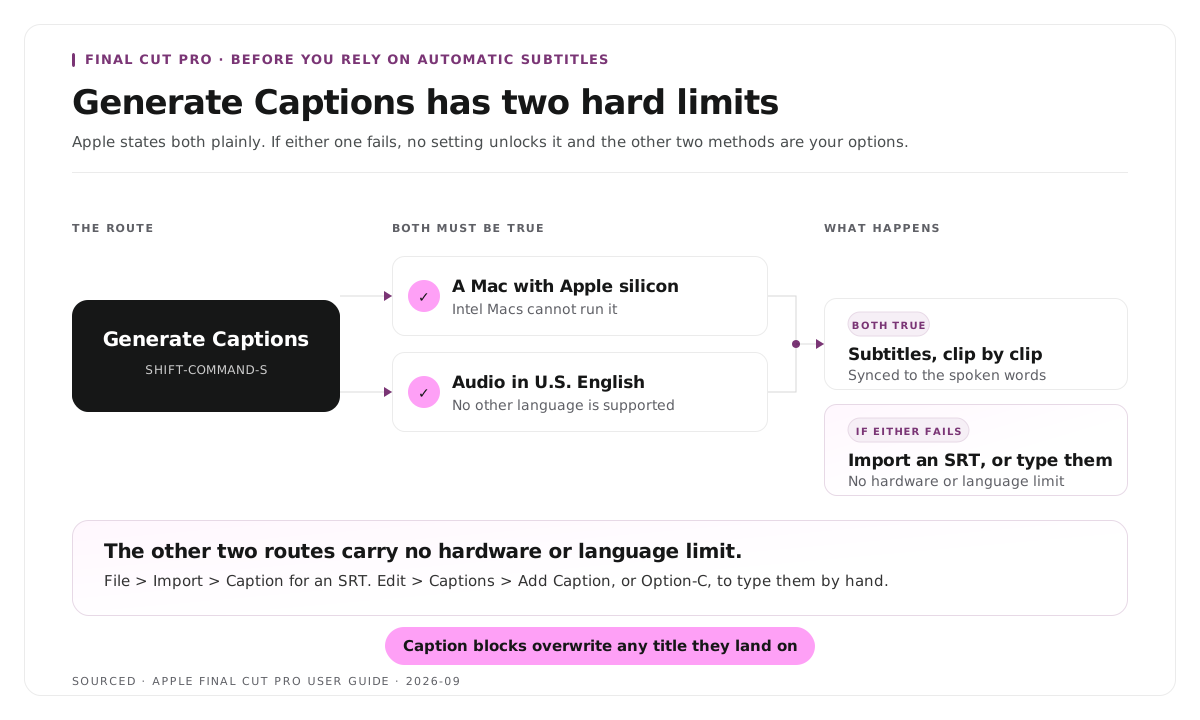
Two limits apply and Apple states both plainly. Generate Captions requires a Mac with Apple silicon, and it is available in U.S. English only.
If you are on an Intel Mac, or working in any other language, this method is not available to you and the next two are your options. That is not a bug and there is no setting that unlocks it.
Correct the text before styling it. Automatic transcription gets proper nouns, product names and numbers wrong at a predictable rate, and correcting after styling means repeating work.
Method 2: import an SRT file
Use this when a caption file already exists, whether from a transcription service, another editor or an earlier version of the project. It also covers every case where automatic generation is unavailable.
- With the project open, choose File, then Import, then Caption.
- Select your .srt file and import it.
Final Cut places the captions according to the timecode inside the file.
The file must match your final cut. An SRT is timed against the version it was created from, so any trim made since shifts everything after it. Generate the file from the finished edit, not from the raw assembly.
Method 3: add captions manually
Slow, entirely accurate, and the right choice for short pieces or footage where the audio is too poor to transcribe.
- Position the playhead where the caption should begin.
- Choose Edit, then Captions, then Add Caption, or press Option-C.
- Type the text into the caption block that appears in the timeline.
- Drag the ends of the block to adjust its duration, and drag the block itself to reposition it.
One thing to watch. Caption blocks will overwrite ordinary titles if you drop them on top of one, so keep captions on their own lane rather than sharing with lower thirds.
Style and position them
Whichever method produced the subtitles, the styling decisions are the same.
Set the size for a phone, not for your display. Subtitles that read comfortably on a studio monitor frequently do not on a handset.
Give them a background or an outline. Plain text disappears over bright footage, and a semi transparent box or a thin dark stroke solves it permanently.
Two lines maximum, broken on natural phrases. A subtitle that splits a name or a number across two lines reads badly and gets misread.
Keep clear of the lower edge. Platform interface elements sit there, and a subtitle behind a progress bar is a subtitle nobody reads. The decisions that leave room for this are covered in how to edit an interview video.
Treatment by audience and platform is covered in caption styles for B2B and B2C platforms.
Export: burned in or selectable
Final Cut handles this through Roles, which is not where most people look for it.
- Choose File, then Export.
- Open the Roles tab at the top of the dialogue.
- Next to the video track there is a captions control. Open it.
- Use the Burn in Captions dropdown to choose which caption text is written into the picture.
Burned in subtitles become part of the image. They always display, cannot be switched off, and cannot be translated or searched. This is what social platforms need, because feed playback is mostly muted and several platforms do not reliably show a separate caption track.
Selectable subtitles export as a separate file or embedded track. Viewers can toggle them, they are searchable and translatable, and they are the accessibility standard for players that support them.
For social clips, burn them in. For a player that supports a sidecar, export that too, since it costs nothing and covers both cases.
Worked example: an Intel Mac and a deadline
This is an invented example, not measured data.
An editor has eight clips to caption and an afternoon to do it. They try Generate Captions, find the menu item does nothing useful, and lose twenty minutes assuming the project is at fault.
The machine is an Intel Mac. Apple restricts Generate Captions to Apple silicon, so the feature was never going to run.[1] The fix is not a setting. It is choosing a different method.
They transcribe the source elsewhere, export one SRT from the final cut, import it once with File then Import then Caption, style the whole track in one pass, and export with burn in selected. The eight clips are done in under an hour.
The time was lost to not knowing the constraint, which is why it appears near the top of this page rather than in a footnote.
Where Montage fits
Montage is not an editor and does not replace Final Cut. It does not grade, composite, or do timeline work, and it will not style subtitles to a brand specification inside Final Cut.
What it does is take a long recording and return the moments worth publishing. Upload up to 20GB at 4K and it gives you 8 to 10 scored clip candidates rather than an unranked pile, each trimmable by editing transcript text, with branded captions and vertical reframing applied, exporting as MP4 for social or as FCPXML for Final Cut.
The FCPXML export is the relevant part. It hands Final Cut a timeline with the cuts already made, so subtitle and finishing work happens on a sequence rather than on eight separately assembled clips. The handoff is described in how XML export solves the producer and editor handoff problem, and the tools in this category are compared in the best AI clip makers for Final Cut Pro editors.
If you finish in Premiere instead, the handoff is covered in how XML export solves the producer and editor handoff problem, and the transcript based trimming approach is in text based video editing.
Limitations and troubleshooting
Generate Captions does nothing. Either the Mac is Intel rather than Apple silicon, or the audio is not U.S. English. Apple restricts the feature on both counts, and no setting changes that.
Subtitles are out of sync after an edit. They were generated or imported before the trim. Regenerate from the final cut rather than re-timing the track by hand.
A caption overwrote a title. Caption blocks replace ordinary titles when dropped on top of them. Keep captions on their own lane.
The exported file has no subtitles. The Roles tab was not configured. Export defaults to leaving them out, so the burn in dropdown has to be set deliberately.
Transcription keeps misspelling the same word. Expected with product names and proper nouns. Correct the text before styling, and keep a term list for recurring names.
Subtitles read well in Final Cut and badly on a phone. They were sized for a studio monitor. Check at playback size and add a background if the footage behind is bright.
Frequently asked questions
Can Final Cut Pro generate subtitles automatically?
Yes. Select clips containing speech, then control-click and choose Generate Captions and Subtitles, or press Shift-Command-S. Apple restricts the feature to Macs with Apple silicon and to U.S. English.
How do you import an SRT into Final Cut Pro?
Choose File, then Import, then Caption, and select the SRT. Final Cut places the captions using the timecode inside the file, so the file must match your final cut.
How do you add a caption manually in Final Cut Pro?
Position the playhead, then choose Edit, Captions, Add Caption, or press Option-C. Type into the block that appears and drag its ends to adjust the duration.
How do you burn subtitles into the video in Final Cut Pro?
In the export dialogue, open the Roles tab, open the captions control next to the video track, and set the Burn in Captions dropdown. Nothing is burned in by default.
Why is Generate Captions unavailable on my Mac?
It requires Apple silicon and works in U.S. English only. On an Intel Mac, or in any other language, import an SRT or add captions manually instead.
Does Montage add subtitles inside Final Cut Pro?
No. Montage applies branded captions to the clips it produces and exports FCPXML so Final Cut receives a timeline with the cuts already made. Styling and finishing remain Final Cut's job.